Sunday, October 7, 2012

2012-10-07 The Fall Crud Run


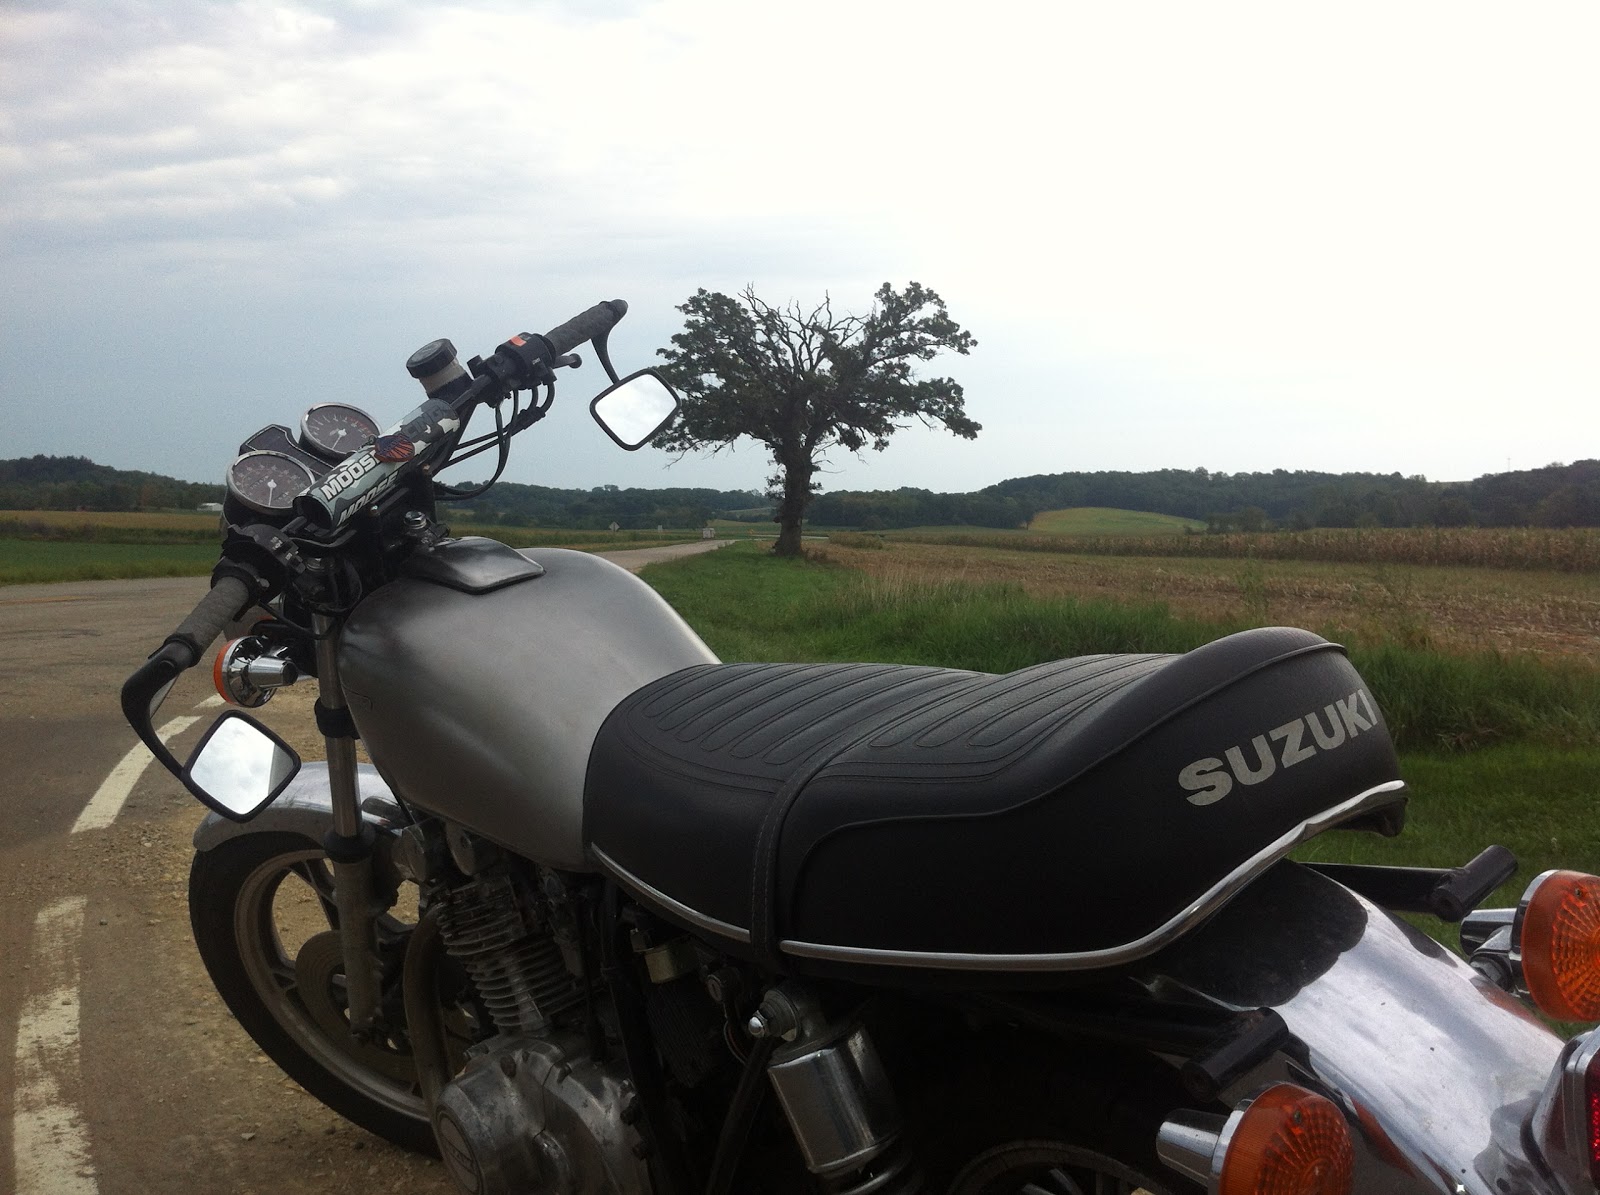
One of my goals for Oldbike this riding season was to put 1000 miles on it and be able to trust the bike out on the open road for long distances.  I’ve been using it pretty much exclusively for commuting around town and putting around the near outskirts of Madison but that had pretty much been the limits of my riding.  I was close to getting to the 1000 mile goal (75 to go) and the season is quickly coming to a close.  One of the events that marks the impending hibernation that our motorcycles must go into is the Fall Slimey Crud Café Racer Run.  The fall run is always the first Sunday in October, with a corresponding Spring Slimey Crud Café Racer Run that is on the first Sunday in May with the two rides meant to bookend the Wisconsin motorcycle riding season.  There is no official route for the run just a starting point of Pine Bluff, WI (most bikes part at The Red Mouse) and the ending point of Leland, WI (Most people parking along the road and across from Sprecher’s Bar).  Anyone who rides in the Alphabet Soup, (what moto-riders refer to the vast numbers of lettered county roads of southwest Wisconsin as) has their own favorite roads so why set limits on the routes.  It’s about a 100 mile trip if you take a fairly direct route.  So that filled the bill for me.  I have been wanting to take my Oldbike to the Crud Run since got it running this would be the day!


It was a cold day, I knew it was going to be a cold one so I didn’t even bother looking at the temperature, that true knowledge would not help motivate me.  My first layer was my Under Armor cold weather compression top and bottoms, and wool socks.  For the bottom the rest was simple just my riding pants and riding boots I figured the air cooled engine might do a little warming for my legs.  Up top was a different story I put on a long sleeve t-shirt a zip up fleece and a Carhartt vest and on top of all that I had my riding jacket and it’s zip in liner,  for my noggin the Scorpion EXO-1000 helmet and for the hands, my Burton snowboarding gloves.  This proved to be just about the right amount of insulation.  I made it to The Red Mouse in Pine Bluff at around 11:30am, a little late to see the peak attendance,   a lot of the people get there much earlier have coffee, breakfast and bullshit for a while with the bikes starting to leave en-masse around 11:00am.  By the time I had downed my coffee and wandered around looking at the bikes I was starting to feel a little warm so I decided it was time to head on up to Leland and cool off a bit.


I stopped by the Vietnam Veteran’s Memorial and snapped a picture of Oldbike there under it’s own power and looking in much better nick than it was the last time it was there.


Here is the picture I took of Oldbike on the day I picked it up in pretty much exactly the same place, just with a Menard's rental truck underneath it!  I thought it was good synchronicity to make a quick stop.


You might not be able to tell in the picture but that is the sign at Leland’s city limits.  I had made it there!  Oldbike rand good all the way up there holding sustained speeds between 60-70 miles per hour for the trip.  The only complaints I got were on some of the steeper hills where the little 423cc engine bogged a bit in top gear and again in fifth when I downshifted too slowly and lose even more forward momentum.


I may have topped off the oil a little too much before I left as I had some oil seeping from the 30+ year old valve cover gasket!


But really Oldbike was none the worse for wear after making the trip, I think it was happy to be amongst friends of a similar vintage.  I actually passed three other bikes of a similar age that looked about twice as pretty that had left their pilots stranded on the side of the road with unknown mechanical or electrical issues.  It did make me feel a little crazy but I trusted the work I had done on the bike and my trust was rewarded.


I bellied up to Sprecher’s Bar and choosing to circumvent Junior’s “Famous” salami sandwich in favor of a Sloppy Joe and some hot chocolate.  As I warmed myself inside I was amazed at how a place like this had managed to stay open for over 100 years, and felt buoyed the fact that the Slimey Crud Café Racer Run probably plays a big part in keeping this bar where you can drink a bourbon and buy a gun at the same time afloat throughout the rest of the year!


It’s definitely a point of pride for Junior the owner and he updates the newspaper clipping with new peak attendance records when pertinent!  You can see the web version of this article if you follow this link.


Having filled my eyes with enough vintage goodness for the day, pointed Oldbike back home and on my back through Sauk City I rolled over the 21000 mile mark accomplishing another goal for the year!  We can probably count on our two hands how many truly good riding days that there are left before the riding season is truly over and on one hand, the good days that we will actually be free to ride.  Looking ahead towards the off-season I’ve got plans to rebuild the front brake and get new pads and shoes all around.  I plan on removing and inspecting the forks cleaning the internals and replacing fork seals if necessary.  I’ll be learning about swingarm bushings and working to enhance the swingarm pivot and inspecting the rear shocks and assessing their performance/condition.  New tires are on part of the plan too and of course a tear-down and inspection of the engine and it’s internals is on tap too.  So stay tuned and I’ll try my best to keep myself and you entertained with more Oldbike goodness!

As always, thanks for reading!

One more post script Return of the Cafe Racers has a little write up I'd like to share about the Slimey Crud Café Racer Run.  If you want to learn more make sure you look at the other hyper-linked test throughout the post there's some good stuff in there!

Tuesday, September 25, 2012

Fabricate a Front Fork Brace


As the café racer “scene” pretty much exploded at the same time I bought Oldbike I fall into a chronological category of people that have been wrenching on and riding vintage bikes probably since before the bikes were considered vintage, definitely before riding an old bike was considered to be “cool.”  Luckily I fell into the Caferacer.net forum purely by accident and/or dumb luck.  I looked around on the website and managed to largely avoid the virtual berating/bashing that I have now seen hundreds of newbies go through most leaving with their tail between their legs.  I say that I was lucky to find them because I have avoided doing a lot of STUPID things to Oldbike just by browsing through the site.  One of the first benefits I was able to take away was in identify and understanding the phenomenon of the “L-bike” fad of the 80’s.


I might try and do a more detailed write up based on the observations I’ve gleaned from Caferacer.net but for now suffice it to say that “L-bikes” do not make good café racers.  Early identification of this fact saved me a lot of wasted time and effort in trying to make a bike into something that is not in its DNA.


Armed with that knowledge I focused my efforts towards converting Oldbike into a sort of urban assault commuter bike.  With that as a goal, the sacrifice of comfort and utility in the name of outright speed went by the wayside.  That doesn’t mean that I’m not interested in making the bike run smoother, accelerate faster, handle better and stop quicker.  That is where this most recent modification comes into play.
Over the years I have seen a ton of people that have made the mistake of taking off the front fender off their “café racer” project, chasing the café racer “look.” Heck… the previous owner had done it to my bike.


Thankfully he had the thing laying in a barn still.  I’m not even sure where the idea originated but I am pretty sure that when the original café racer scene was going on I don’t think that people were pulling the front fenders off their bikes.  Maybe the people who do this are making an attempt at saving weight, they are barking up the wrong tree.  I’ll go into a little detail as to why; while the forks are held together by the triple trees and the axel at the bottom of the forks this is not enough to provide the stability and handling that you want in a motorcycle.  If you think about it, on a standard (non upside down) fork, the skinniest part of the fork is what is attached to the triple tree. This is going to give you front to back flex no matter what.  Now, each lower portion of the fork cartridge moves independently of each other unless they are joined together.  Joining them with just the axle may seem like enough but it’s not when you take into consideration all the forces that your front wheel experiences with bumps, braking and acceleration many times not when the bike is upright.  Having that single point of union will still allow the forks to compress and rebound at different rates, affecting the bikes handling and the feel you get in through the handlebars.  The front fender gives you a second structural union to between the two forks which forces them to move at the same rate and keeps the front wheels’ attitudes as intended buy the manufacturer and as desired by the rider.


I would always see the guys telling the newbies that if they wanted to take off the front fender they needed to get a fork brace.  I had no idea what one was but once I had an understanding of the aforementioned workings of front forks, seeing one for the first time made perfect sense.


Not to jump ahead chronologically in the photos but this is the only one that I have that shows the inner side of the fender clearly.  You can see that even the manufacturer had attempted to bolster the strength of the connection between the forks with some extra material.  Even with the front fender installed on Oldbike I got a lot of feedback through the handlebars, there was so much vibration through the handlebars that I couldn’t tell what the front end was doing, the useful information got lost in the (excuse the pun) chatter.
Being that I the two sets of discarded handlebars as well as some engine guards and a welder I got to thinking that I might try and make a front fork brace for Oldbike.  The difference would be that I would mount mine over the fender keeping it in place.


The above pictures are of the mounting brackets I cut off of the engine guard, which you can see in the picture below.


Above you can see the two sets of handlebars collected into the front fender.  I basically cut them up into straight portions and curved portions.  An effort was made to keep the mirrored portions the same lengths.


The leading portion would be made up of four sections and would be more “square” than the trailing portion which you can see in on the floor in the above picture.


The trailing portion was made of three pieces and was more rounded.


Here you can see them tacked together.


Completely welded.


And with the welds ground down and one of the mounting points attached.


Here is the basic layout I was going for.


Once I got the first mounting point attached I was able to put it on the fender and use the mounting holes and some clamps to keep everything aligned.


Here it is completed.


Because of the clearance issues with the forks I had to remove the front wheel and then slide the brace and fender up between the forks.


And above are a few shots of the finished product.  Things could still be cleaned up more really but right now I am testing for function, I’ll worry about form later on.  After the first ride I was amazed at the difference the brace made.  Almost all of the extra chatter that I was receiving through the handlebars was eliminated, and only useful feedback was coming through.  The front end was hugely improved!  I would not have expected such an improvement!

At first I had concerns about adding the extra weight to the front end (the brace is pretty heavy) but I think that the improvements were well worth the increase in weight.
Below I have a video if I took of the complete product, installation and reactions after a first test ride.


And as a bonus of sorts I made a video eleven days prior of a ride on Oldbike Basically I took one of my gloves off, shoved it into the breast pocket of my jacket and then stuck my iPhone into the said pocket so the camera lens stuck out.  Consequently you get a view to the left side of the road I am on but I figured you could hear how the GS sounds in all the gears and up to around 60-62 miles per hour in places.


Thanks to all who read the blog!  Not sure what the next installment will entail but I’ll try and make it sooner than later!

Sunday, September 2, 2012

Change the Brake Fluid, Grind the Exhaust Welds, Bar-end Mirrors


Hey everyone, sorry I haven’t been updating much this summer.  I’ve pretty much just been riding Oldbike around so there hasn’t been too much to talk about.


One thing that I noticed in as I have been riding around is that the front brakes were starting to feel spongy.  Realizing that I never really did anything with the brakes I decided that I should flush out the old brake fluid, bleed the line and see if that helps the stopping.  As soon I opened the master cylinder I realized that I may have been dumb to wait so long to check this.  Look at the coloring for the brake fluid! I’ve never seen brake fluid that dark!


So I drained the fluid out of the system, using my MityVac…


…it goes pretty quick when there is only a single brake caliper and brake line involved.  The inside of the master cylinder was coated in residue from the old fluid.  I didn’t take a picture of that but here is what it looked like after I cleaned it up.


The rubber in the cap was in good shape.


 I flushed and filled the system with Valvoline Syn-power full synthetic brake fluid.


You can see in the background that this fluid is a million times clearer than the old fluid.  After getting my hands dirty with the brake fluid change I felt like doing a little more work.  If you remember earlier I had welded the exhaust system pieces together in an attempt to get rid of the exhaust clamps and completely seal the system from exhaust leaks.  At that time I left the welds raw and didn’t do any grinding on them, I had noticed some soot coming from a couple pinhole leaks where I had welded so I decided that I should finally get the exhaust off, grind down the welds and seal up the pinhole leaks.


You can see that I welded the H-pipe to the headers and then welded the reducers onto the headers and then to the Harley Davidson silencers that the previous owner had put on the bike.


As I mentioned before that doing this makes the exhaust slightly harder to remove and install because you have to pull the headers apart to get them around the lower frame tubes in front of the engine but it is doable and I don’t have too much trouble with taking them off and on.  I just want to mention that in case anyone else decides to do this.  It was a lot of grinding to get the welds cleaned up but after I got them looking good I got the welder out and sealed two or three exhaust leaks and ground them down again.
The end result looks much better.


I am a point of conundrum with the exhaust system now.  It’s obviously still a cobbly exhaust setup.  It’s completely effective but I am trying to decide how much more time I want to dedicate to it.  There are spots that are rusty the chrome Harley Davidson silencers have some scrapes and scratches on them and so do the headers.  Do I want to try and dress them up even more cosmetically?  I could rough up the chrome and get the wire wheel after the headers and paint them with high temperature exhaust paint, but experience tells me that that sort of paint doesn’t stay pretty forever.  Should I just use it the way it is and if at some point I l find a good deal on a MAC 2 into 1 exhaust for it do that.  I’m still up in the air about that.  I definitely don’t want to spend a lot of money on an exhaust seeing as how this one is doing the job just fine.
The last thing I did to the bike was finally adding rearview mirrors.  These bar-end mirrors were donated to me from a friend and were originally on his Speed Triple.  The brand I believe is “Napoleon” and it appears that they are no longer made but the reviews are generally positive about them.  I have to admit that they have great visibility and they look good!


That pretty much should bring you up to speed with Oldbike.  I’ve put on over 700 miles on the bike this summer (all around town) and it have been very reliable now and ton’s of fun.  If I do more work on the bike before fall I’ll make sure to update here on tap for the winter will be a engine teardown and rebuild, should be fun!

Thanks to everyone for reading!


Monday, June 4, 2012

Goodbye to the Philabang’r


One of the most random things about Oldbike from the very start was the writing on the left hand side (only) of the tank.  I should have asked the previous owner what the heck it met but honestly I didn’t put much thought into it until so many people asked me what the deal was with “Philabang’r?”  I had no idea and over the last (almost) two years it kind of became something of a likable quirk about the bike.  When I was thinking about what to do next with the bike (for the most part I have just been riding it as of late) now that it is reliable, I put some cosmetic things on the docket this time.  There were some suggestions to get keep the “Philabang’r” maybe in a new font or so far as to preserve the original and clear coat over it in it’s original form.  I liked that idea in a kitschy way but in the end thinking about down the road when this project meets it end and it’s time to sell Oldbike it that it might be a turn off.  So it had to go!


I used a wire wheel and some 4-1/2” Perfromax rust and paint removers on my drill to take the paint off the tank.  You can see (above) the Suzuki emblems mounting points that were “Bondo-ed” over.  To whomever did the bodywork on the tank the fill work on the mounting points did a good job.  I was surprised to find them under there!


It wasn’t a one night job getting the paint off the tank I would do as much as I could stomach each night and then applied 3 in 1 oil onto the bare metal so that it wouldn’t rust.


I also must mention, MAKE SURE THAT YOU TAKE ALL THE GAS OUT OF THE TANK AND THAT IT IS PORPERLY AIRED OUT SO THAT THERE ARE NO GAS FUMES.  The wire wheel on the bare metal can make sparks and that around gas or gas fumes can cause explosions.    Some people may say that I should have used chemical paint removers but I have never had good luck with those and the mess that they create.


Once I got the paint off the tank it dawned on me that maybe I don’t need to paint it at all why not just go clear coat on bare metal?  There are some dings in the tank (it is 30+ years old) and the methods I used to get the paint off were going to make polishing the tank to a mirror finish not a possibility (at least in my skill set).   So I decided that I would so some polishing but not to a mirror finish.


Below you can see my first coat being applied on the tank it looked great but I put it on too thick and there were a few runs.


It was to a point where I could almost see myself in the tank.


Unfortunately when I was wet sanding the runs in the clear coat I burned through and had to take it all off and start over.  And while I smoothed it even more with the wet sandpaper the second time the finish ended up being more satin.


I actually like it better I have 5 coats of clear on it now and I think it is a huge improvement over the “Philabang’r.”


Of course, as one thing gets done another issue arises.  I noticed a small leak where the shift shaft comes out of the case that will need to be addressed soon.  It is a VERY slow leak and depending on the amount of work to do I may end up monitoring the oil level and making repairs when the riding season is over.  Stay tuned for the next installment coming soon and as always, thanks for reading!